25 Bathroom Renovation Tips That Prevent Costly Mistakes
A bathroom may be one of the smallest rooms in a building, yet it brings plumbing, waterproofing, electrical work, ventilation, glass, hardware, tile, and custom cabinetry into the same tight space. That is why many expensive bathroom failures do not look like failures on handover day. The room appears finished; the inconvenience shows up after weeks of real use.
Good bathroom renovation is less about collecting fashionable products and more about making decisions in the right order. The 25 bathroom renovation tips below focus on the details that become difficult—or impossible—to correct after walls are closed and tiles are installed. They are relevant to homeowners as well as designers, contractors, and buyers working on apartment, villa, and hospitality projects.
Quick answer: Plan the room around movement, drainage, waterproofing, service access, ventilation, and storage before selecting finishes. Decorative items can be replaced later. A misplaced drain, inaccessible valve, or badly coordinated vanity usually requires demolition.
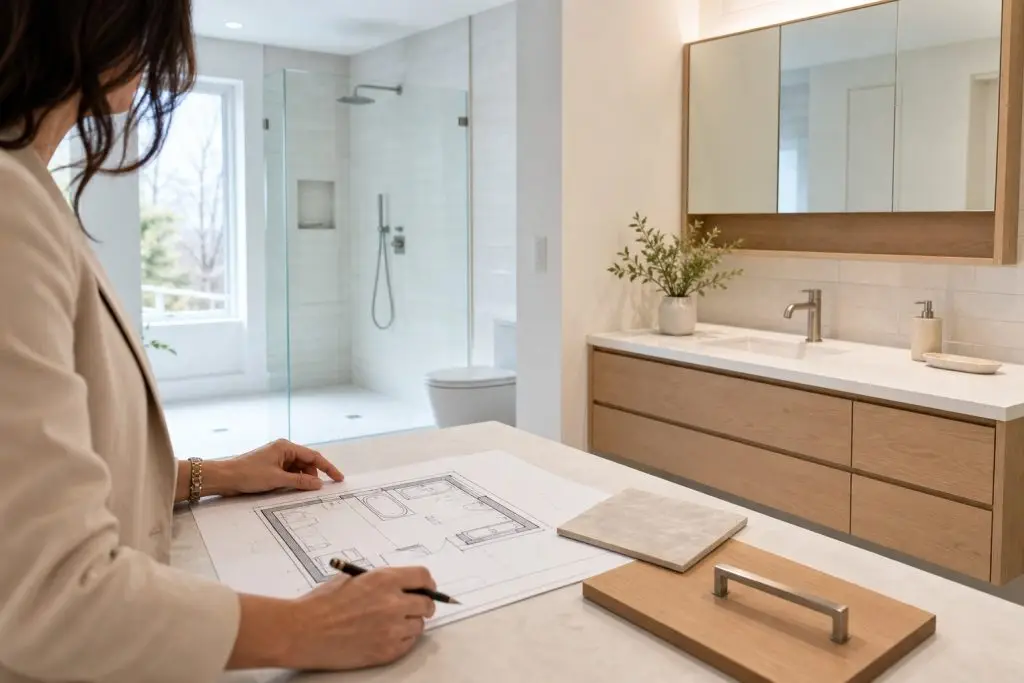
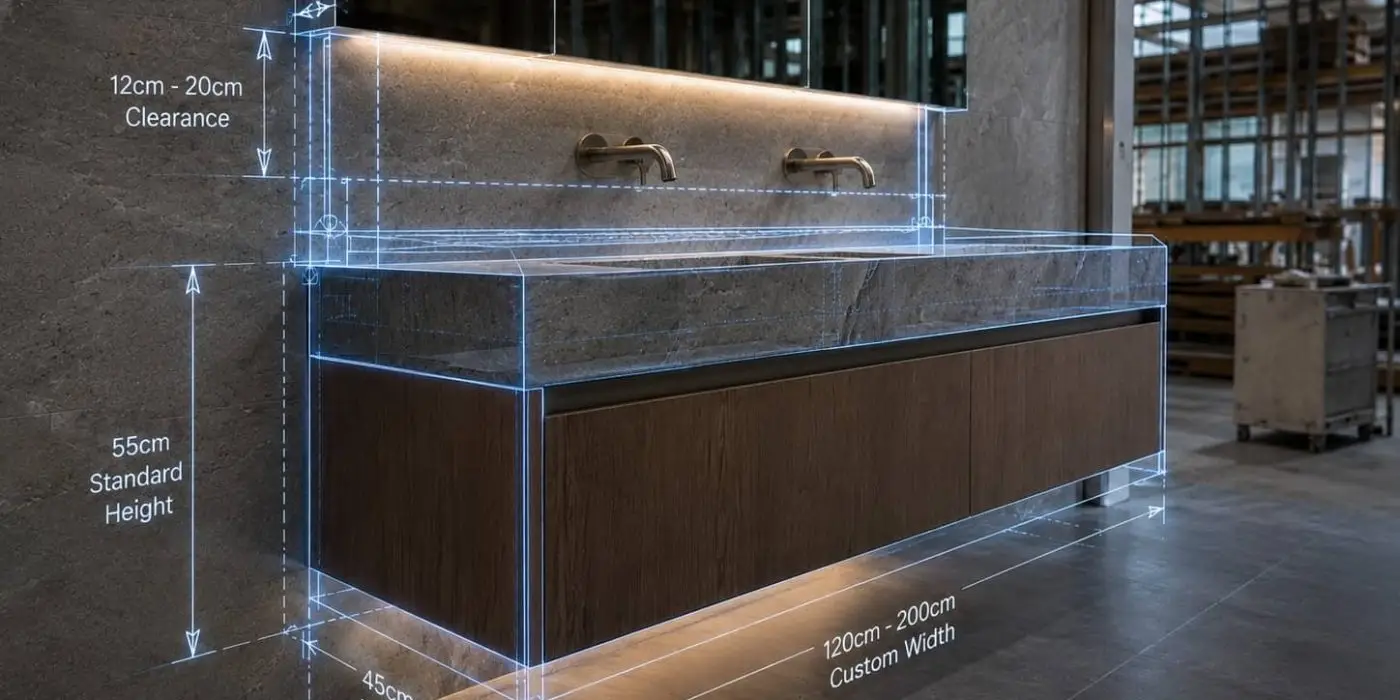
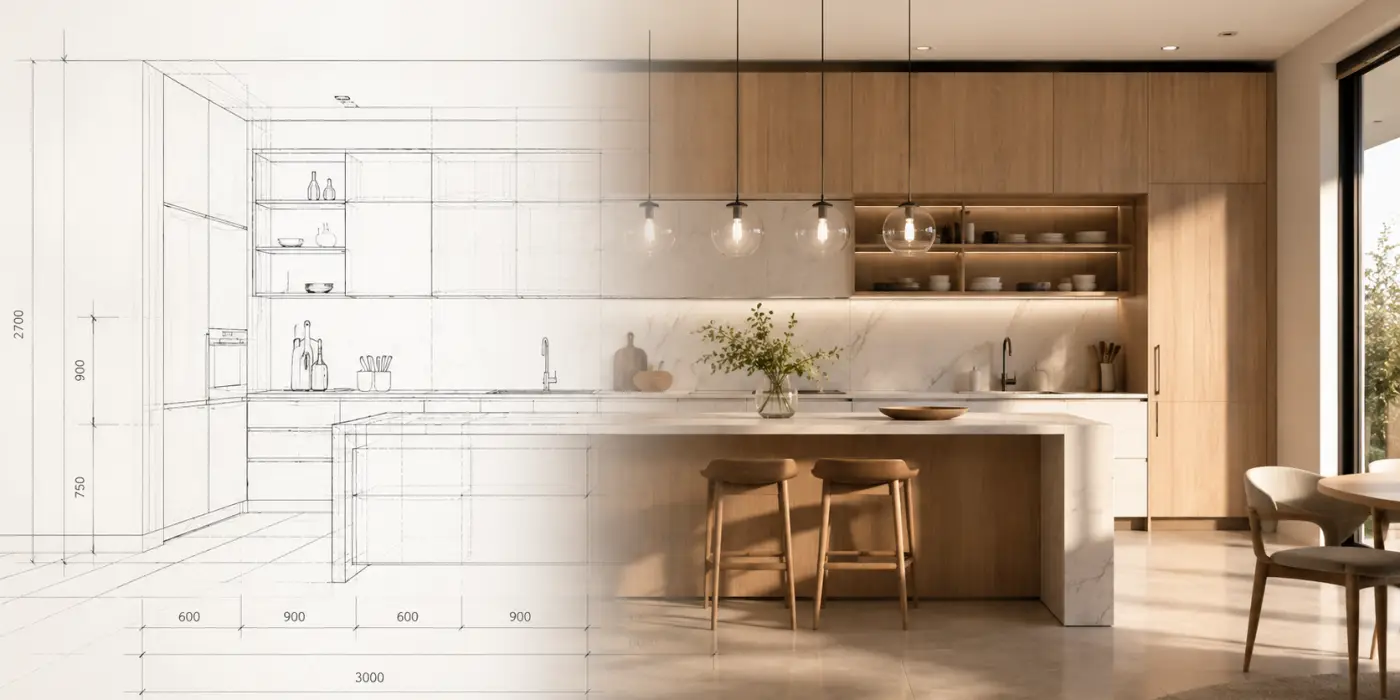
Coordinating dimensions, finishes, cabinetry, and fixtures during design helps expose conflicts before construction.
Plan the Bathroom Around Real Use
1. Test movements, not only dimensions
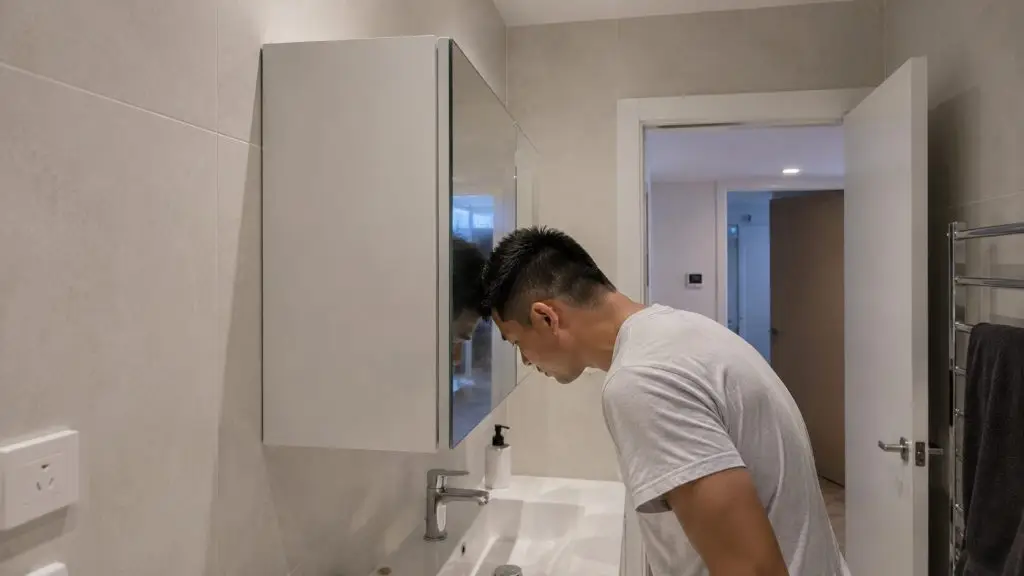
A layout can fit on a drawing and still feel awkward. During design review, simulate ordinary actions: opening the shower door, bending over the basin, pulling out the vanity drawers, helping a child at the toilet, and cleaning behind the glass. These small movements reveal conflicts that static floor plans often hide.
As a practical planning benchmark, a 900 × 900 mm shower feels more usable than a severely compressed enclosure, while 1000 × 1000 mm gives many users noticeably more freedom. Vanity depths commonly fall around 500–600 mm, although a shallower cabinet may be the better choice in a narrow room. These figures are design references, not universal code requirements; always verify local regulations and product instructions.
2. Select critical fixtures before fixing plumbing points
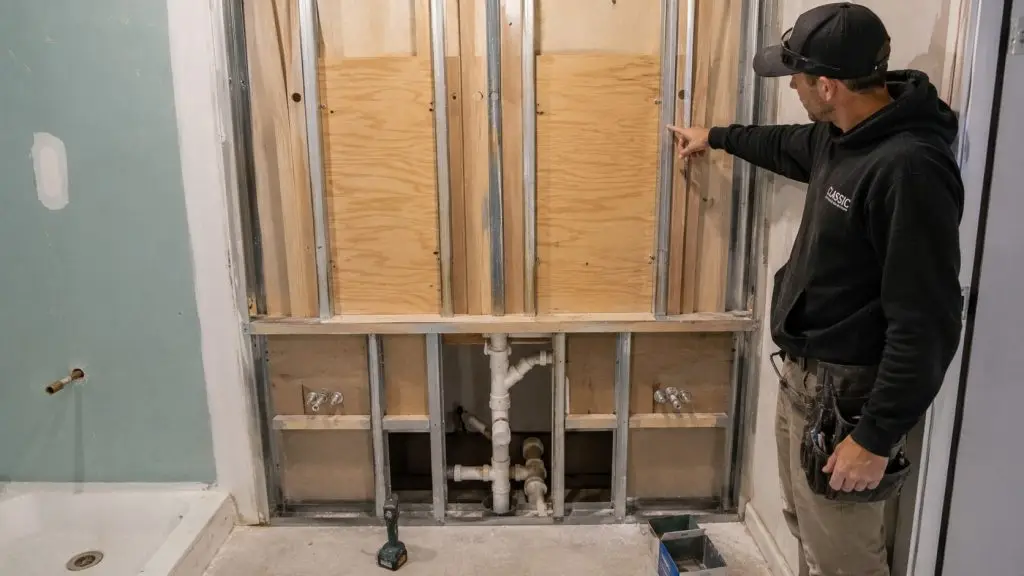
One of the most avoidable site problems occurs when plumbing is installed according to a contractor’s “standard position” and the fixtures are selected later. Toilet rough-in, concealed cistern height, basin waste location, mirror-cabinet power, and concealed shower bodies should all be coordinated before walls and floors are closed.
Hot water is commonly placed on the left and cold water on the right. Reversing those connections may be tolerable with some manual mixers, but it can prevent a thermostatic valve from operating correctly. A small coordination error becomes an ugly repair once the pipework is behind tile.
3. Put household routines into the brief
Will two people use the vanity at the same time? Does anyone wash their hair at the basin? Is the room used by children, older adults, or someone with limited mobility? These questions shape the design more than a style label does.
A busy family bathroom benefits from divided storage and an easy-clean floor. A primary bathroom used by two adults may need a longer counter rather than two cramped basins. Where aging in place matters, wall reinforcement for future grab bars, slip resistance, seating, and low-level night lighting should be addressed before finishes are chosen.
Get Waterproofing and Drainage Right
4. Design the floor for water movement
Bathroom floors need a continuous fall toward the appropriate drain. Large-format tiles can make that harder in compact spaces because the installer has less freedom to create several slopes without awkward cuts or lipping. Drain position and tile layout should therefore be developed together.
A useful site procedure is to mark the finished levels of the shower, dry area, doorway, and drain before tiling. Conduct a water-flow check before grouting and sealing are complete. Discovering a permanent puddle after final cleaning leaves only two options: live with it or remove finished work.
5. Decide the shower threshold before tiling
A threshold installed on top of finished tile is straightforward and easier to replace, but it relies heavily on sealant and may follow the floor slope. A recessed threshold set roughly 10–20 mm into the floor can create a cleaner water barrier and tile transition, although its position becomes difficult to change without disturbing the waterproofing.
Neither method is automatically superior. The correct choice depends on the enclosure system, waterproofing continuity, future replacement plans, tile junctions, and the competence of the installation team.
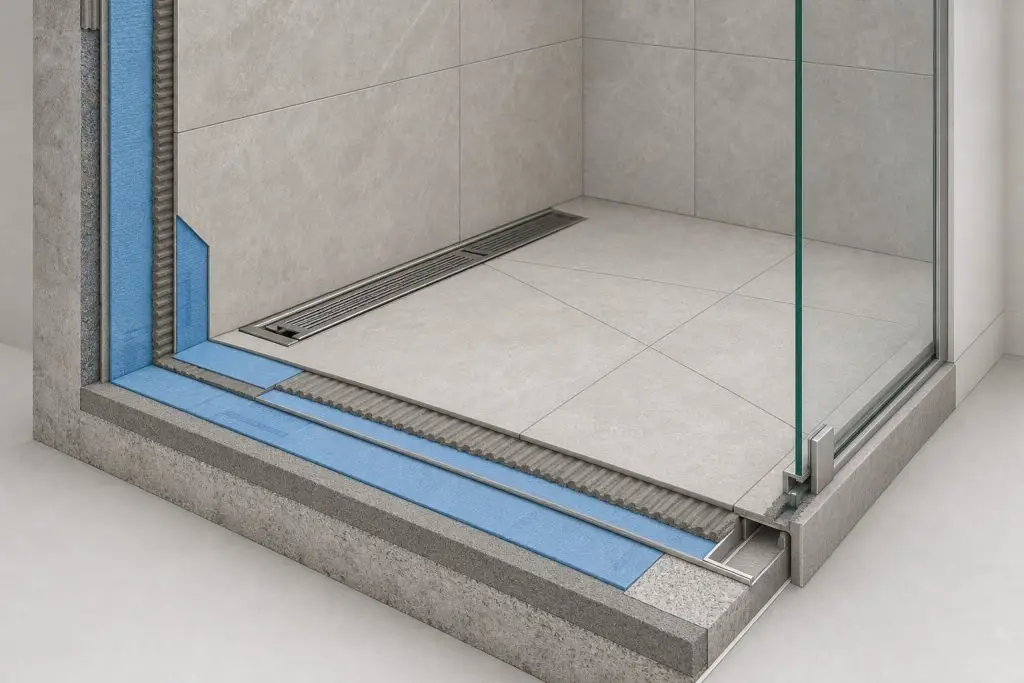
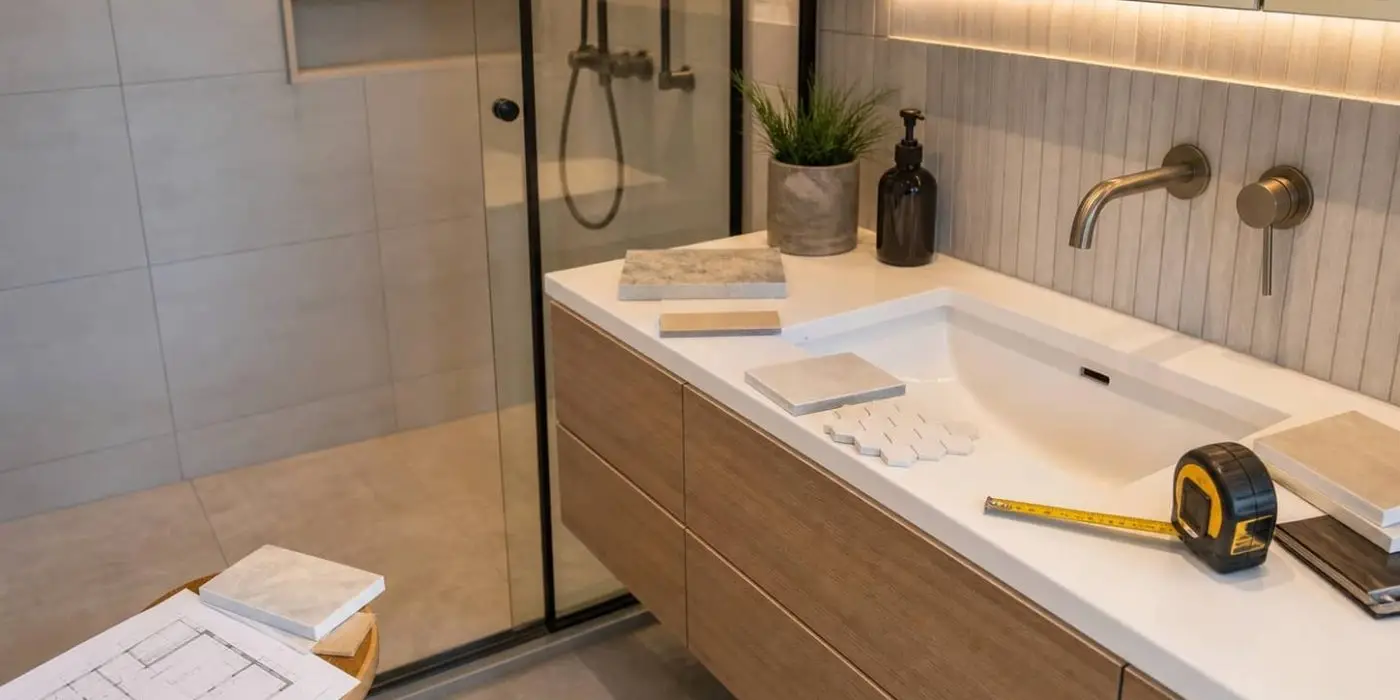
Shower detail concept: floor falls, linear drain, waterproofing, tile build-up, and glass fixing should be coordinated as one assembly.
6. Choose the drain for its duty, not its cover plate
The decorative grate has little to do with odor control or discharge performance. Those functions depend on the drain body, trap, pipe size, installation depth, and maintenance condition. A shower drain must handle hair and regular cleaning; a washing machine releases a concentrated volume of water and may require a dedicated connection.
Gravity flaps, water traps, and other drain inserts all have limitations. Before purchase, confirm the pipe diameter, available depth, expected flow, frequency of use, and whether the insert can be removed and replaced. A serviceable component is more credible than a promise of permanent odor prevention.
7. Treat pipe noise before the riser is enclosed
Waste-stack noise can be disruptive in apartments, particularly below occupied floors. Acoustic treatment must be installed before the pipe chase is closed. Access to valves, cleanouts, and traps should remain possible. A heavily boxed-in pipe is not good workmanship if a future repair requires breaking the wall.
Treat the Shower as a Safety System
8. Do not seal the enclosure to the ceiling for appearance alone
A full-height glass box may look neat in a rendering, but a hot shower inside a poorly ventilated enclosure can feel oppressive. Leaving a practical ventilation opening above the operable section usually provides a better balance of privacy, warmth, and air movement, especially where older users or children share the bathroom.
9. Specify safety glass, hardware, and installation together
Shower enclosures should use safety glazing that complies with the destination market. Check permanent safety markings, glass thickness, panel dimensions, hardware capacity, edge clearances, and fixing conditions. Laminated safety glass can retain fragments through its interlayer; compliant safety film may be used with certain tempered-glass systems to reduce fragment scatter.
For US projects, consult the federal Safety Standard for Architectural Glazing Materials in 16 CFR Part 1201. Other markets have their own requirements. A test report from one country should not be assumed to satisfy the rules at the project destination.
10. Keep forced warm air away from the person under the shower
Placing a warm-air unit directly over the wet user sounds efficient, but airflow accelerates evaporation from the skin and can make the person feel colder. A central or dry-zone location often circulates warm air more evenly while staying clear of direct spray. Infrared heat lamps and fan heaters work differently and should not share the same placement logic.
11. Design concealed shower valves for maintenance
A concealed shower system saves space and reduces exposed fittings, but it must remain serviceable. Confirm that cartridges and control parts can be accessed through the faceplate, that replacement parts will be available, that the wall has sufficient depth, and that pressure testing is documented before closure.
For compact bathrooms, a single-lever basin mixer is usually quicker to operate than separate hot and cold handles. A pull-out faucet is useful when the basin is also used for hair washing or frequent cleaning. Check hose routing inside the vanity; a pull-out hose that catches on stored products quickly becomes a nuisance.
Measure the Toilet Zone Before Ordering
12. Confirm rough-in dimensions from the finished wall
Toilet rough-in should be measured from the finished wall surface to the center of the waste outlet. Tile, adhesive, leveling, and wall lining may reduce the dimension by 10–30 mm compared with the unfinished room. If the toilet is purchased from a rough shell measurement, it may sit too far from the wall or fail to fit.
The safer sequence is to establish the finished wall build-up, verify the outlet center, and order against the manufacturer’s drawing. Products marketed as suitable for two rough-in sizes may introduce additional openings, adapters, or seals, all of which deserve inspection.
13. Use a wall-hung toilet only where the building supports it
A wall-hung toilet creates a continuous floor that is easy to clean. The concealed cistern ledge can also become useful storage. The trade-offs are additional wall depth, more exact installation, restricted waste-routing options, and usually higher equipment and labor costs.
A common project mistake is adding a wall-hung toilet after seeing a showroom display, when the waste stack and wall construction have already been fixed. Long offsets and unnecessary bends can create blockage and access problems. Make this decision during layout and drainage coordination, not after tile delivery.
14. Give a handheld bidet sprayer its own shutoff
A bidet sprayer is inexpensive and useful for cleaning the toilet, floor, and shower glass. It should have an accessible isolation valve and a hose rated for the expected water pressure. Closing the valve during long absences is a sensible precaution; relying indefinitely on a low-cost flexible hose is not.
Design the Bathroom Vanity as Wet-Area Equipment
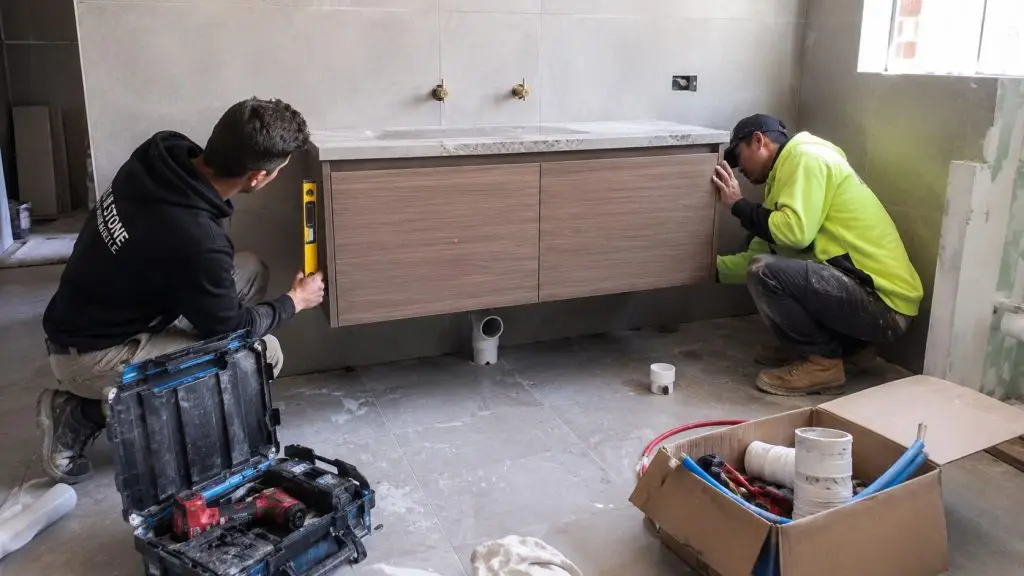
15. A wall-mounted vanity needs a wall designed to carry it
Raising the cabinet off the floor improves cleaning and makes a small room feel lighter. The wall, brackets, and fixing points must still support the loaded drawers, countertop, basin, and users who may lean on the edge. Lightweight partitions require reinforcement before closure.
For an export project, vanity shop drawings should define wall conditions, fixing methods, countertop weight, basin openings, and responsibility for site reinforcement. Manufacturing the cabinet correctly solves only half of the installation problem; the other half is in the building.
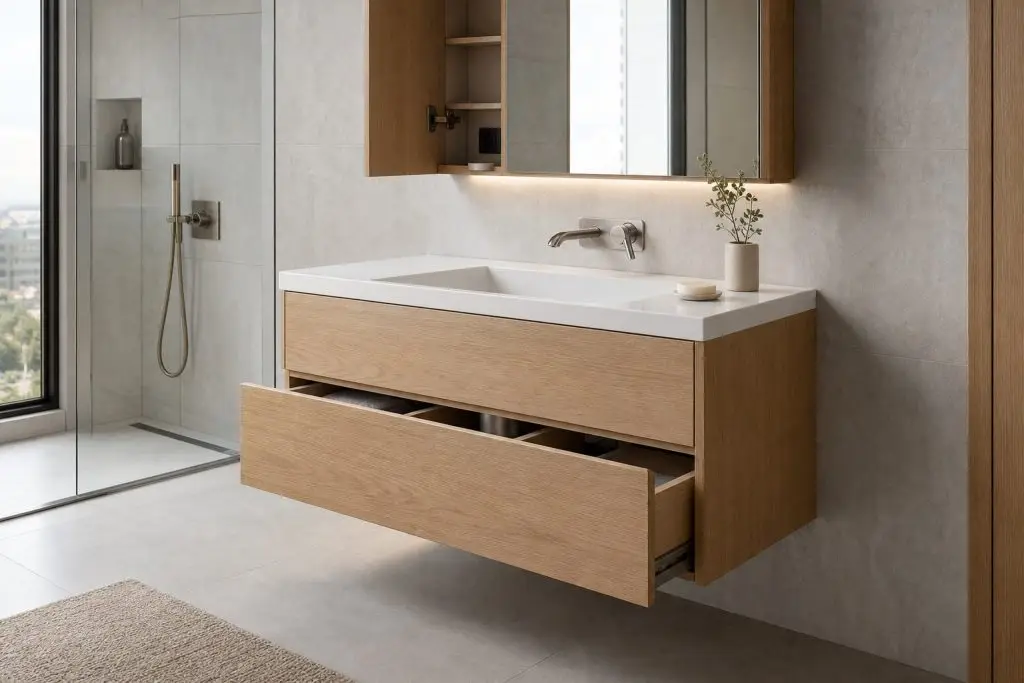
A wall-mounted custom vanity requires coordination between drawers, basin, wall drainage, mirror storage, and electrical services.
16. An integrated basin reduces joints but still needs drainage
An integrated countertop basin can remove dirt-catching seams and simplify cleaning. Inspect the basin slope, waste fitting, overflow, backsplash, and perimeter water control. A shallow bowl with a nearly flat base may photograph beautifully and still leave water standing in the corners after every use.
17. Storage usually matters more than full-surface demisting
Compact bathrooms need shallow, reachable storage for toothbrushes, razors, skincare, and medicine. A mirror cabinet clears the counter and can include an internal outlet for rechargeable devices. That daily convenience often provides more value than choosing a plain heated mirror with no storage.
Demisting is still useful, but it should not eliminate maintenance access or cabinet capacity. Some systems need to be switched on before the shower, and heating components do not last forever. A mirror cabinet with local demisting, effective extraction, and well-positioned lighting is often the more balanced solution.
18. Wall drainage creates better drawers only when it remains accessible
Moving the basin waste into the wall frees the vanity interior and removes a pipe penetration from the floor. It can support deeper drawers and easier cleaning. The pipe fall, joints, waterproofing penetrations, and future access should be shown on the coordination drawings rather than improvised on site.
19. Moisture resistance depends on sealed edges and penetrations
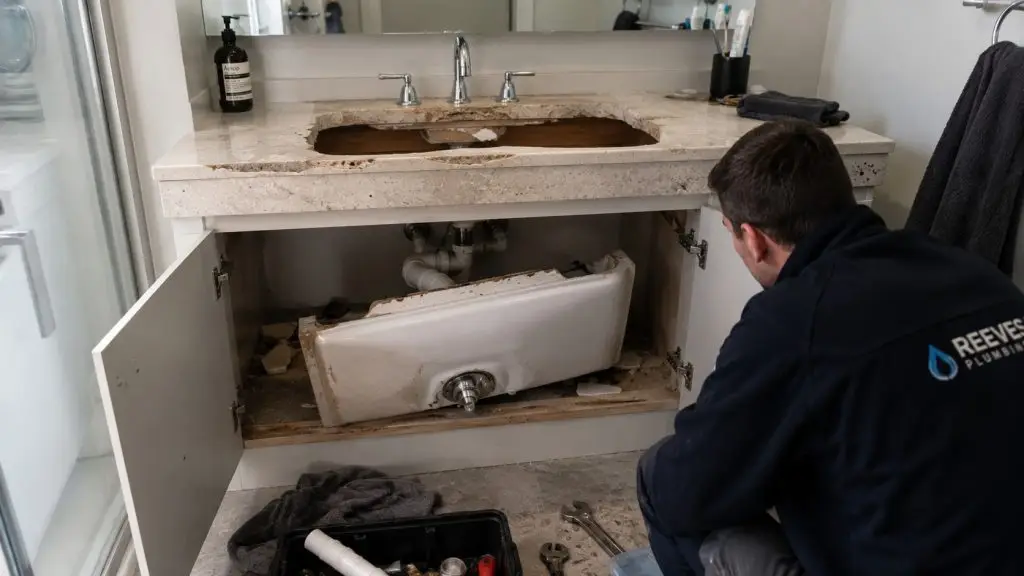
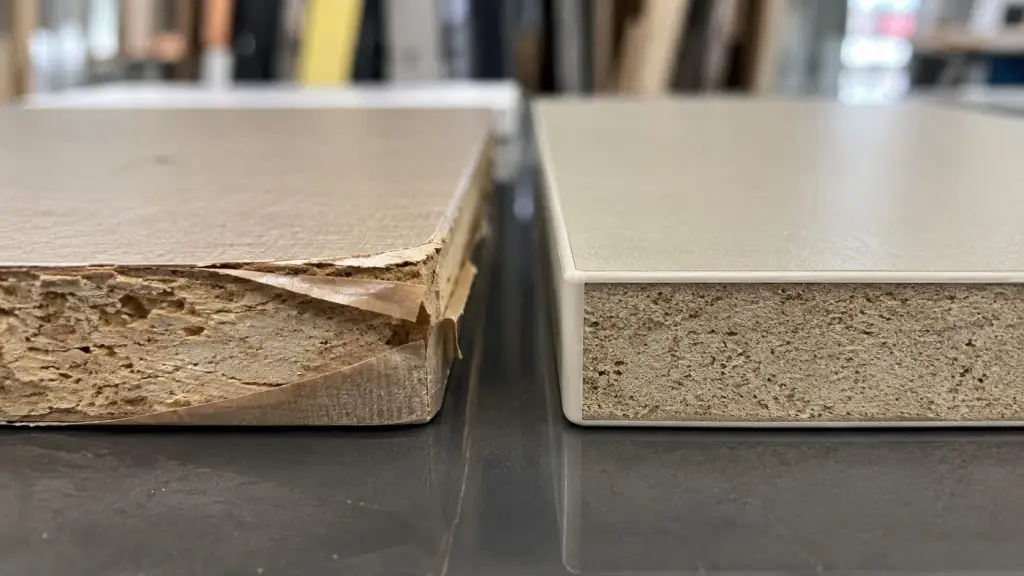
The name of the board material does not tell the whole durability story. Basin cutouts, hardware holes, back-panel edges, and site-made cuts are common moisture-entry points. In apartment and hotel projects, swollen vanity panels are often traced to an unsealed field cut rather than failure of the visible face finish.
Expect Tile, Edges, and Sealant to Age
20. Pure white floors advertise every hair and water mark
White tile can make a small bathroom feel larger, but it also highlights hair, residue, and discolored grout. In a frequently used family bathroom, a pale gray, warm gray, or lightly patterned finish is usually more forgiving. Review floor samples horizontally under realistic light; a tile viewed vertically in a showroom can look very different at home.
21. Tile build-up changes cabinetry and door dimensions
Tile thickness, adhesive, leveling compound, and wall correction all reduce the finished room size. A vanity fitted between two walls can fail to install because of a few accumulated millimeters. Mitered tile edges, metal trims, and other corner details also change finished dimensions and should be coordinated before cabinetry is released for production.
22. Select sealant by joint and environment
Joints around toilets, shower frames, basins, and countertops are exposed to recurring moisture. Use a sealant appropriate to the substrate and application, then follow the manufacturer’s requirements for cleaning, joint size, tooling, and cure time. Premium sealant applied to a wet or dusty surface is still a poor joint.
Mold can be cleaned and deteriorated sealant can be replaced, but recurring growth may indicate leakage, condensation, or weak ventilation. Treat the moisture source, not only the visible stain.
Coordinate Doors, Ventilation, and Electrical Work
23. A barn door saves swing space but gives up acoustic privacy
A sliding barn-style door can help where there is no room for a conventional door swing. It also needs a clear wall beside the opening. Because the leaf sits away from the wall, it provides less acoustic and odor control than a well-fitted hinged door. That trade-off may be acceptable for a little-used internal bathroom and uncomfortable beside a living area.
The overhead track carries the full door weight. Lightweight walls need reinforcement before installation. Fixing a heavy door to an unsuitable partition is the beginning of movement, noise, and loose hardware.
24. Ventilation needs both extraction and replacement air
Moisture control depends on extraction, makeup air, duct design, and user habits. A powerful fan connected to a long duct with several tight bends may perform poorly. A sealed door with no transfer path can also restrict airflow. Keep the fan running after bathing and remove persistent standing water rather than expecting a “mold-resistant” finish to solve the moisture load.
The US Environmental Protection Agency recommends controlling indoor moisture and correcting water problems promptly to limit mold growth. Fan capacity, duct routing, and electrical installation must still be selected for local codes and project conditions.
25. Build the outlet plan from an equipment list
A modern bathroom may include a smart toilet, mirror lighting, demister, hair dryer, electric toothbrush, shaver, heated towel rail, and exhaust fan. Providing one general outlet near the basin usually results in adapters and extension leads later.
Place outlets clear of wet zones, drawer slides, cabinet backs, and moving doors. Use locally required ground-fault protection, such as GFCI or RCD protection. For a smart toilet, coordinate the outlet, water valve, side clearance, and cable route before the toilet is delivered.
Pre-Construction Bathroom Checklist
- Obtain installation drawings for the toilet, shower, basin, vanity, and mirror cabinet.
- Verify critical dimensions from finished surfaces, not only unfinished walls.
- Coordinate shower falls, threshold, drain position, and tile layout on one drawing.
- Provide service access for concealed valves, cisterns, wastes, and electrical components.
- Verify glazing, electrical, waterproofing, and accessibility requirements for the destination market.
- Confirm wall reinforcement, vanity fixings, basin cutouts, and sealing of site-made edges.
- Label cabinetry and packages by project, room, location, and drawing reference.
- Complete flood, flow, drainage, electrical-protection, and hardware-function tests before handover.
Frequently Asked Questions
Which bathroom renovation mistakes are most expensive to fix?
The most expensive mistakes are usually hidden behind finishes: incorrect drains, poor floor falls, broken waterproofing continuity, inaccessible valves, misplaced concealed cisterns, and missing electrical points. Surface colors can be changed. Errors inside walls and floors normally require demolition.
What should be prioritized in a small bathroom?
Prioritize safe movement, drainage, ventilation, and storage. A wall-mounted vanity, mirror cabinet, drawer organization, forgiving floor finish, and a practical wet-dry division often create more value than squeezing in a bathtub, double basin, or full-height enclosure.
Should a custom bathroom vanity be measured before or after tiling?
The design and service points should be set before tiling, while final production dimensions should reflect reliable finished-surface information. Wall-to-wall vanities, wall-drain cabinets, and integrated stone basins require particular care. In repeat projects, standard modules can be combined with fillers to absorb site variation.
How can mold and bathroom odors be reduced?
Remove water quickly, exhaust moisture, maintain traps and drains, and repair leaks. Check that the room has both extraction and a replacement-air path. Repeated mold or odor is often a symptom of drainage, condensation, or ventilation problems rather than a shortage of cleaning products.
Turn the Design Into Buildable Bathroom Cabinetry

Before export, project vanities should be inspected for dimensions, drawer function, finish, accessories, and package identification.
A successful bathroom depends on coordination between details: drawers must clear the waste, the vanity must avoid valves, the mirror cabinet needs power, basin cutouts must match the selected product, and every package has to reach the correct room.
If you are sourcing bathroom vanities or whole-house cabinetry for a residential, apartment, villa, or hotel project, send your plans, elevations, material requirements, quantities, and destination to OneStopHomeDeco. The project team can support cabinet detailing, sample approval, package labeling, and quotation preparation.
Sources & Further Reading
- Electronic Code of Federal Regulations: Safety Standard for Architectural Glazing Materials
- U.S. Environmental Protection Agency: Mold and Moisture
- U.S. Department of Justice: 2010 ADA Standards for Accessible Design
Last reviewed: June 26, 2026.
Note: ADA accessibility standards are used as a U.S. reference only. Local building codes and project requirements may vary.