Lessons Learned from International Bathroom Vanity Procurement: 4 Common Mistakes We See in Multi-Family Projects
In our years of supplying custom joinery and building materials for overseas multi-family residential and apartment projects, we’ve noticed a consistent trend: the bathroom vanity is often the product with the highest call-out rate and the most on-site installation disputes.
Many developers and procurement managers skim through shop drawings thinking a vanity is just a wooden box holding a sink—as long as the rendering looks sharp and the wholesale price is low, they sign off. However, in international markets, exorbitant local labor rates and strict building inspections will ruthlessly multiply the cost of any minor manufacturing oversight left unaddressed at the factory.
Rather than rehashing textbook definitions, this article breaks down a few real-world hard lessons we’ve encountered on-site and what they actually cost developers.
1. The Melbourne Plumbing Oversight: When a Floor-Drain Clash Forced On-Site Wall Ripping
Floating or wall-mounted vanities are practically standard in modern Australian and North American apartments. They offer a premium aesthetic and make floor cleaning much more manageable. But if your team isn’t cross-checking the rough-in plumbing layout before the mass production phase, it’s the beginning of a logistical nightmare.
During a past apartment project in Melbourne, the client signed off on a massive batch of wall-mounted vanities without verifying the site’s drainage configuration. When the container arrived and the installation crew unboxed the first units, everyone realized the issue: the building was roughed in with traditional floor drains, not wall wastes.
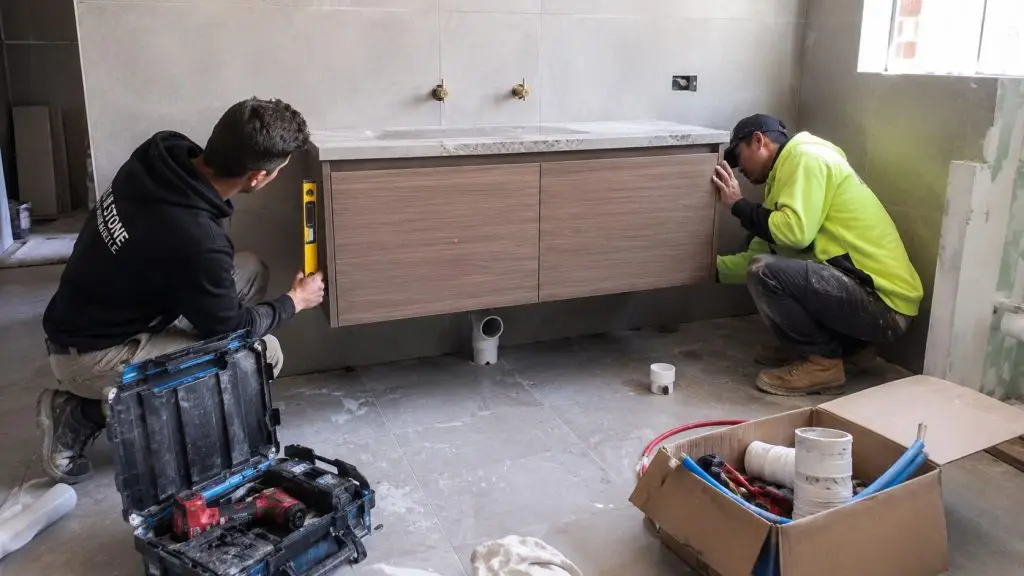
Mounting a floating cabinet over an exposed, unsightly vertical PVC waste pipe was out of the question—it completely ruined the high-end finish the buyers expected. Because the developer had already booked the local council’s hand-over inspection, waiting weeks for a replacement shipment wasn’t an option. The site manager had no choice but to hire local plumbers to rip out the newly laid tiles and concrete walls to reroute the plumbing into the wall. That single oversight delayed the hand-over by nearly two weeks and triggered massive variations in expensive local secondary labor costs.
On-Site Takeaway: If you want that clean, floating look, wall-waste rough-ins must be strictly enforced from day one of plumbing. Furthermore, many overseas partition walls (lightweight steel studs and drywall) simply cannot bear the weight of a heavy ceramic top plus the cabinet. Before ordering, always ensure the carpentry team installs solid double-layer plywood backing inside the wall frame during the framing stage.
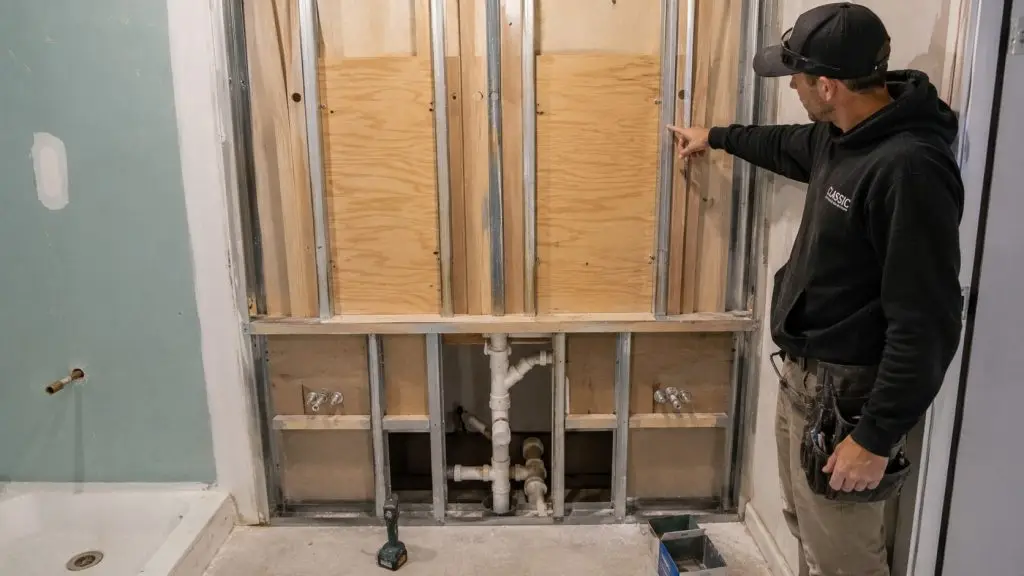
Otherwise, you risk the entire vanity sagging or tearing out the plumbing months after hand-over.
2. When Vanity Mirror Cabinets Are Too Thick, Users Pocket the Cost with a Bumped Head
This is a classic ergonomic design failure that frequently slips through the cracks. In many micro-apartment developments, design teams try to squeeze every millimeter of storage out of a small floor plan by asking the factory to increase the depth of the mirror cabinets so more toiletries can fit inside.
However, during a routine mockup room review on one of our projects, we noticed a critical issue: because the mirror cabinet was specified at over 25 cm deep, anyone leaning forward over the basin to wash their face would literally hit their forehead against the glass mirror the moment they stood up straight.

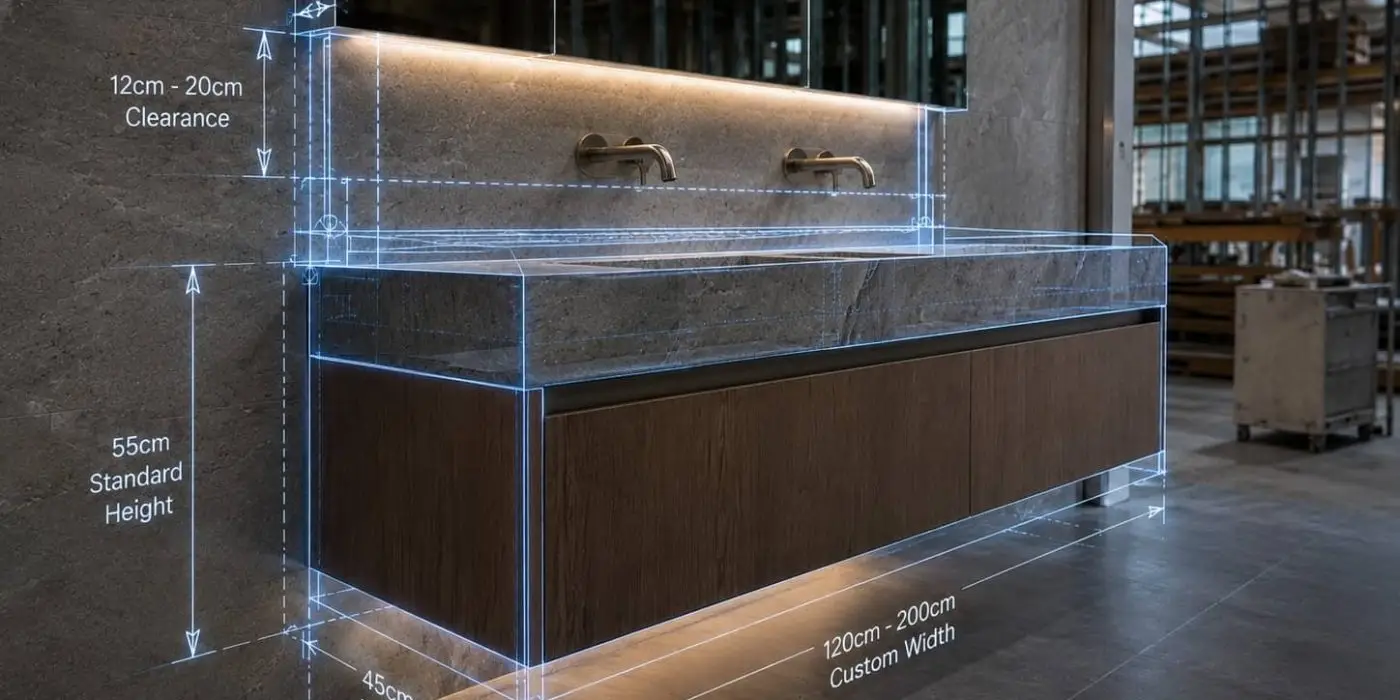
In commercial joinery standards, the external depth of a mirror cabinet should be strictly kept between 12 cm and 20 cm. Anything deeper severely compresses the clearance zone above the basin. This type of dimensions trap is incredibly difficult for an independent buyer to spot on a flat 2D architectural drawing until the physical bulk cargo lands on-site.
3. The Undermount Sink Catastrophe: How Skipping a $2 Bracket Triggers a $2,000 Lawsuit
To achieve a minimalist, seamless look, most mid-to-high-end residential projects pair quartz or sintered stone countertops with an undermount ceramic basin. This specific joint is a notorious hotbed for structural failure.
Some non-standard, budget-tier workshops join the undermount basin to the stone top using nothing but a bead of anti-mold silicone adhesive. While this holds up perfectly in a factory showroom, a 40-day ocean transit inside a sweltering, high-humidity shipping container causes the chemical properties of cheap silicone to degrade before the goods even land. Once tenants move in, fill the sink with water, and repeatedly lean on the counter, a silicone-only joint will eventually give way.
We were once called in to rescue a villa development in New Zealand where the previous supplier had skipped the undermount hardware. The sinks in multiple units collapsed entirely, shattering the P-traps below and completely flooding the vanity interiors, ruining the multi-layer bottoms.
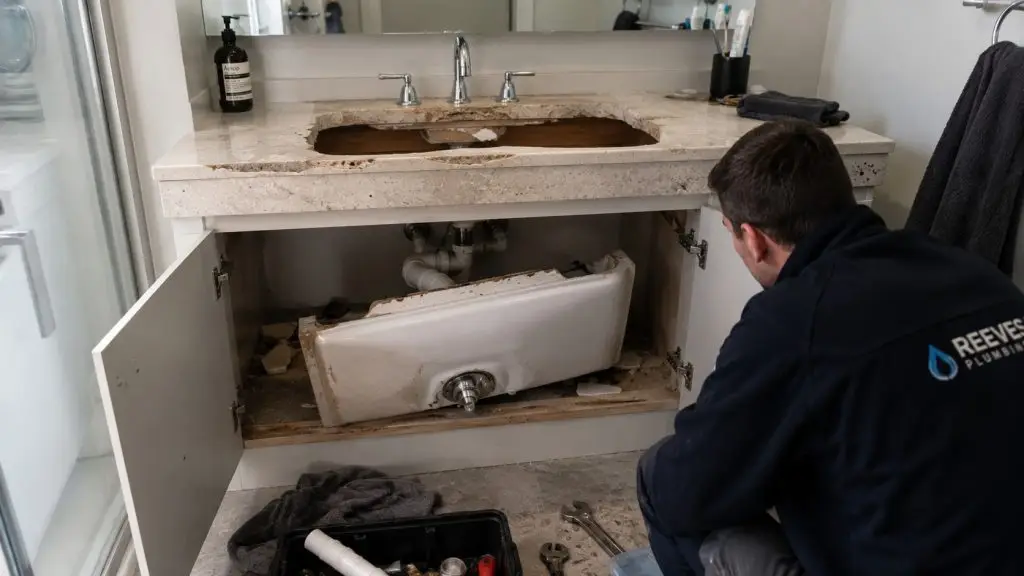
Our manufacturing mandate is now simple: every single undermount basin must be secured with factory-welded stainless steel undermount brackets or mechanical stone anchors in addition to structural adhesive. Spending a fraction of a dollar more at the factory floor saves developers thousands of dollars in overseas remediation and legal headaches later.
4. Why We Phased Out Traditional EVA Edge Banding for Export Projects
The maritime supply chain is incredibly harsh on engineered wood joinery. High-salinity sea air and container sweating will aggressively hunt down any flaw in a cabinet’s sealing.
Years ago, while auditing regional component suppliers, we learned this the hard way. While premium moisture-resistant plywood is an excellent core substrate for bathrooms, the standard EVA hot-melt glue edge banding commonly used in domestic factories fails miserably when shipped to tropical or coastal environments like Suva (Fiji) or Darwin (Australia). After a year of exposure to hot bathroom steam, the edges inevitably begin to delaminate and swell.
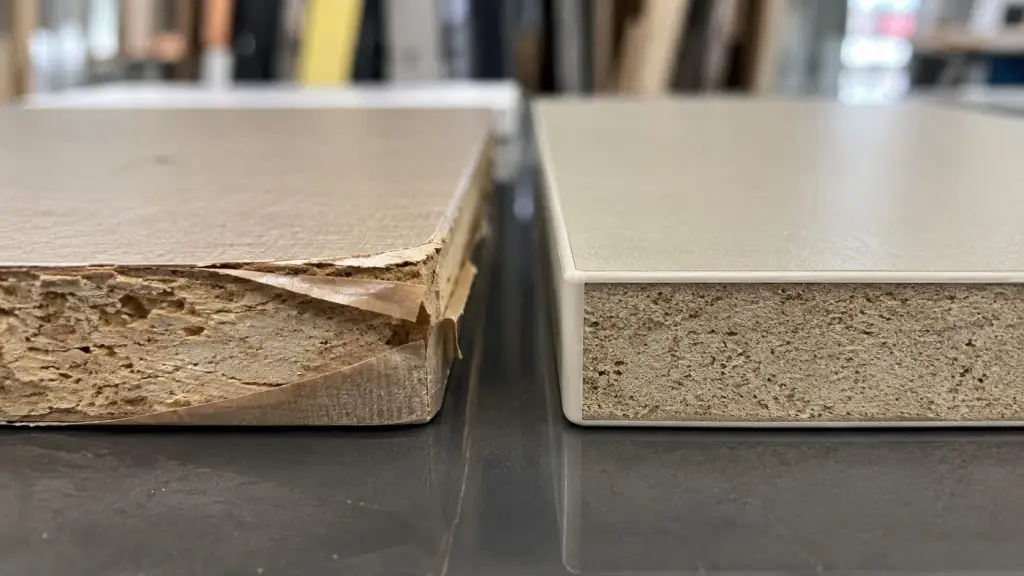
This is exactly why we at George Group completely rewrote our manufacturing protocols for multi-family exports. We permanently replaced standard EVA machines with PUR (Polyurethane) polyurethane edge banding lines. While traditional banding can peel after sitting in a humid container for a month, PUR cross-links chemically with the wood fiber, forming a waterproof barrier that absolutely will not delaminate under extreme moisture or thermal shock.
We applied this same rigorous approach to the smart mirror cabinets (featuring integrated LED task lighting and defoggers) demanded by European and North American developers. Rather than using standard domestic electrical components, our production lines utilize double-insulated waterproof backboards built strictly to UL or CE compliance standards, ensuring the property passes local electrical code inspections without a hitch.
Final Procurement Advice
When sourcing bathroom vanities internationally, anyone can copy the dimensions on an architectural specification sheet. However, the real value lies in the unwritten manufacturing nuances—the details learned only by getting your hands dirty on-site, dealing with local trade unions, and watching cargo survive a rough ocean crossing.
For large-scale multi-family and hospitality developments, consistent quality control and risk mitigation are infinitely more valuable than a slightly lower upfront unit price. The ultimate margin-killer isn’t the cost of the cabinet; it’s the cost of a crew of local tradesmen sitting idle on-site because a bulk shipment failed inspection. Partnering with a manufacturing team that actively de-risks your project during the shop drawing phase is the cheapest insurance policy a developer can buy.